Wednesday 25 December 2013

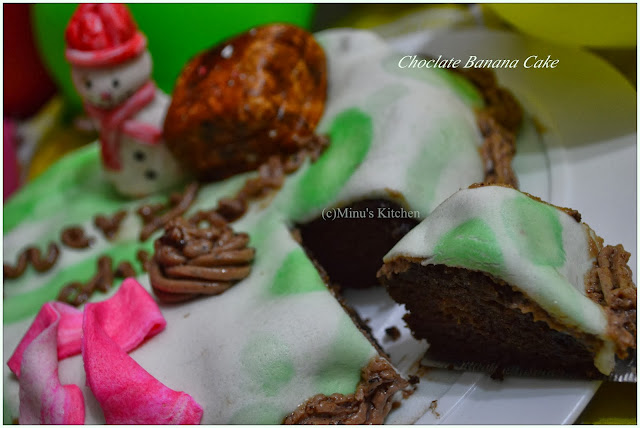
I was waiting for a right choice to post this recipe, as I always love the banana bread, this is another version of it but we mix some chocolate here. As today being Christmas, I thought of making a cake which doesn’t need a beater or electric mixer as anyone can make it, as it involves just the mixing and its purely optional for you. And for the very first time at Minu’s kitchen I am posting a cake with a fondant. I always have wondered on some of the Christmas cakes how they make such a perfect fondant, with some funky stuff on it. One of my experimental fondants I have done after a very long time is this. When I say fondant, you can prepare it in many types or you can get it as readymade in many grocery stores in the baking area, but its little expensive; instead you could prepare it at home as it is very simple and easy to make. The variety is the Marshmallow fondant; you can buy these marsh mallows at any grocery stores. They are little cute spongy isn’t it! :) .


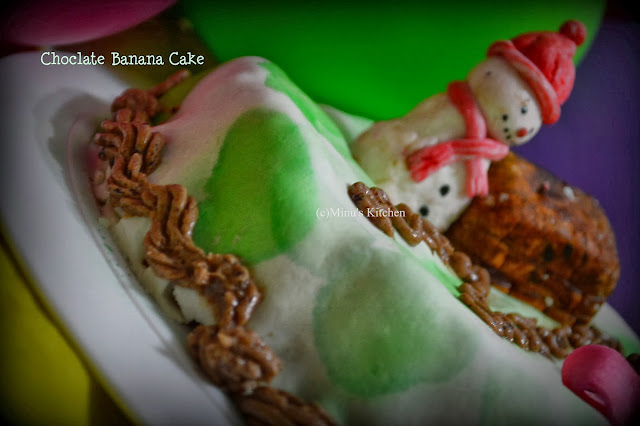
Making a fondant is similar how you make dough for any snacks, the consistency should be correct else you cannot work with it. After you make it, you can mix it with any desired food color however make sure to use a branded food color to taste better and gives you a great look as well. I used the Americolor which are really rich and nice. Look at the snowman it’s very easy to make with the fondant and you can make it to any form and use to the cake. It was real fun to play with that but it takes time if you are doing it for the first time.

I did some frosting as well for the cake as part of decorating the cake however everything is optional and your choice, as if you need just the cake or the cake with fondant / frosting or both. The same colors I used for the icing as well. After you make it just put it inside the refrigerator for about 20 minutes to get that consistency, also an important factor while you make fondant cakes is, always choose cakes which is easy and simple as it may take much time to decorate, in that case the chocolate banana cake is the best choice…and that will be the best Christmas cake. I wish all my readers a Merry Christmas


To Make Marshmallow Fondant:
  • Marshmallows- 1 Lbs
  • Powdered Sugar- 2 Lbs
  • Water- 2 Tspn
Method:

  • Sprinkle the water to the marsh mallows and heat it in microwave for 1 minute, at this time all the marshmallows will dissolve, stir continues with a rubber spatula without any lumps in it.
  • Add the powdered sugar and kneed with hand until the dough is formed.
  • After its done wrap with a cover or in a Ziploc and store it in refrigerator.
 

For the Rich Creamy Frosting (If you wish to make):

Ingredients:

  • Butter at room temperature- ¾ Cup
  • Vanilla Extract- 1 Tspn
  • Icing Sugar- 2 Cups


Method:

  • Beat the butter and vanilla extract until light and fluffy.
  • Add the sugar and beat again at high speed. If icing is too thick, add milk 1 teaspoon at a time, to desired consistency.
  • Makes 2 1/2 cups


To Make the Chocolate Banana Cake:

Initial Requirements:


  • Temperature:350 Degrees F(177 Degree C)
  • Time:35- 40 Minutes
  • Pan Used: A 9 inch (23 cm) round cake pan
Ingredients:
  • All-purpose flour- 2 Cups
  • Sugar- 2 1/2 cups
  • Cocoa powder or melted Choco chips- 1 Cup
  • Baking Powder- 2 Tspn
  • Baking soda- 2 Tspn
  • Mashed Bananas (Ripe)- 1 ¼ Cup
  • Vanilla extract – 2 Tspn
  • Warm water- 1 ¼ Cup
  • Milk- 1 Cup
  • Any Oil- 1 Cup
  • Salt- ¼ Tspn


Method:

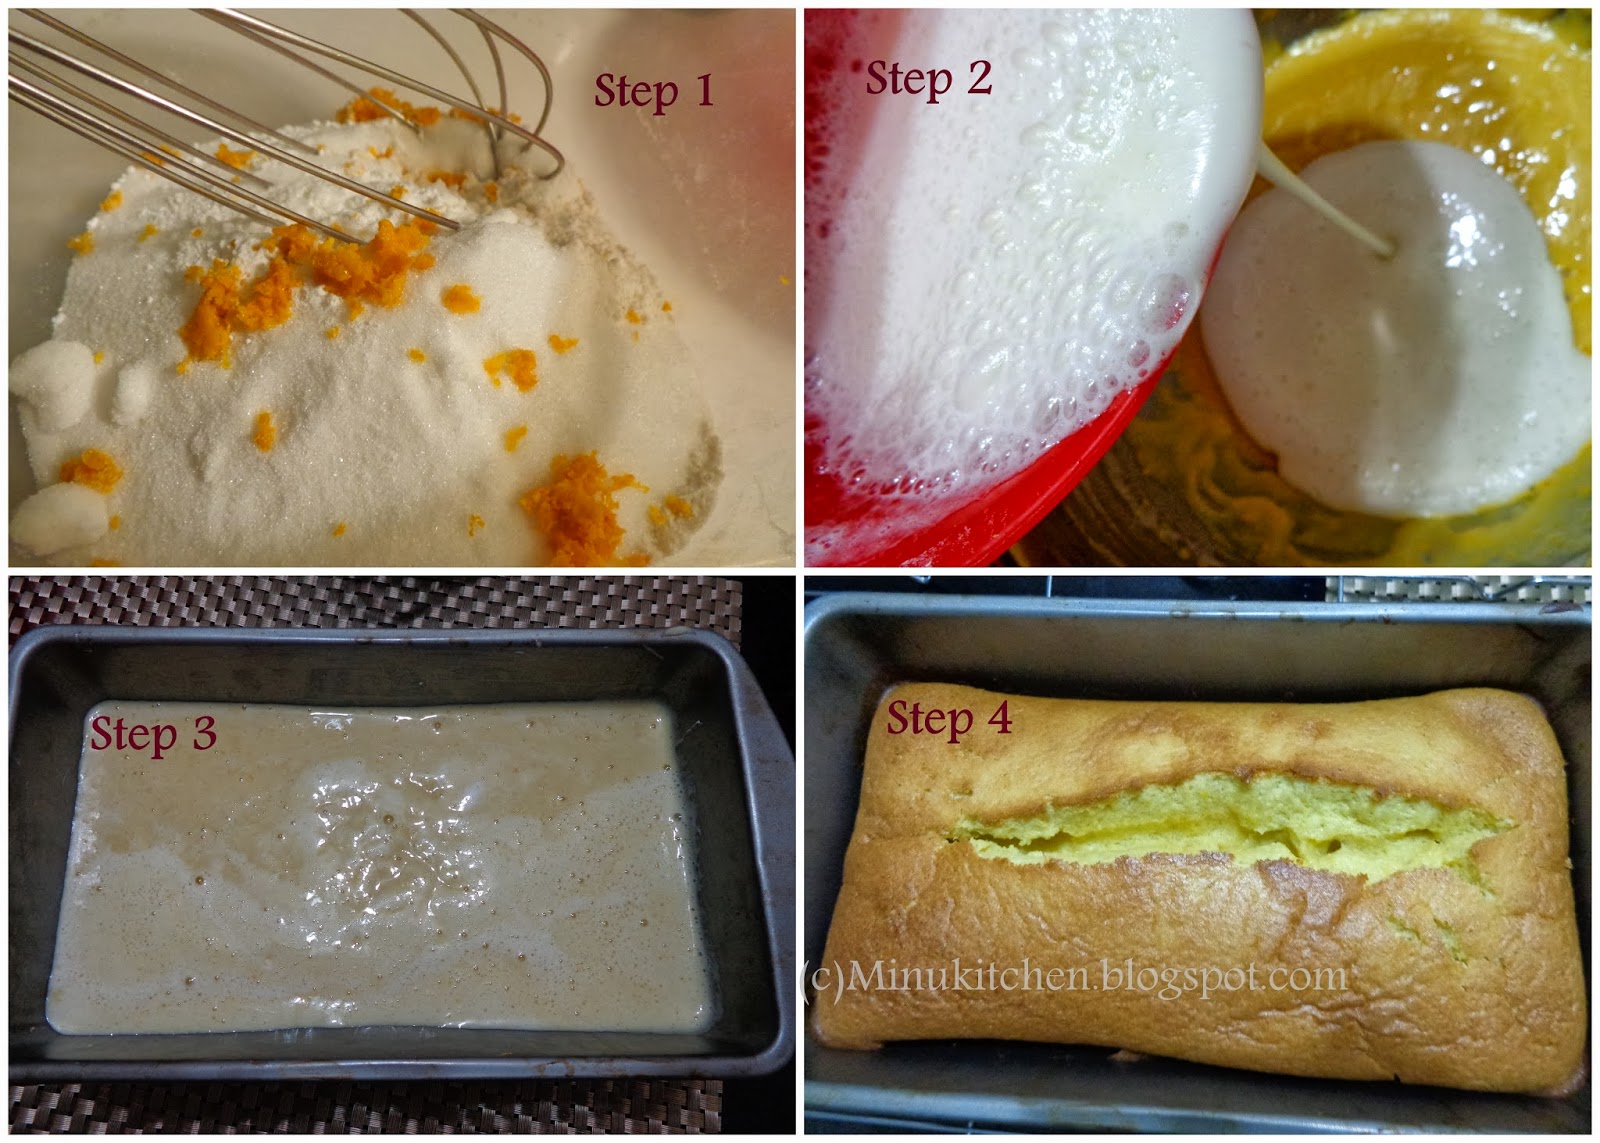
  • In a bowl, sift the sugar, flour, cocoa powder, baking powder, baking soda, and salt together and keep aside.
  • In a mixing bowl, beat the eggs on high speed for about 1 minute and add the mashed bananas, water, milk, oil, and vanilla extract and beat again for about a minute(beating is purely optional, you can just stir or whisk if you don’t have a beater/electric mixer)
  • Now add the sifted flour to the egg mixture and combine well with a rubber spatula.
  • Pour the batter to the cake pan and bake until a toothpick inserted at the middle comes out clean.


To decorate the cake:

  • Make a sheet out of the fondant by a rolling pin and spread that to cover the cake.
  • You could use the remaining fondant to form as any shape and affix to the cake.
  • With the frosting made you could decorate it at the bottom of the cake like the way I did.

Friday 20 December 2013

Researchers worldwide have discovered that eating fish regularly may reduce the risk of diseases ranging from childhood asthma to prostate cancer as it is low in fat, high in protein and an excellent source of omega 3 fatty acids. From my childhood I have used to it as my mom everyday prepares fish, that’s the food culture followed by many keralites. It’s been a while that I was thinking to post a unique fish recipe apart from the usual curry or the fry and I ended up in this. This is the first time I made it and believe me my BF and I just loved it and posting it in my blog for my readers. If you are a fish lover I bet you gonna fall in love with this recipe as it gives a nice spicy taste packed with roasted masala.

To prepare this, you may need a whole small fish I prefer karemeen if you don’t get this in the place you live then you could prefer tilapia or pomfret fish. You can also try this with any other small fishes but those fishes will give you the exact taste. Normally many of ladies don’t prefer to eat fishes with mercury as it’s not good for health, same with me as well. I always prefer for tilapia as its rich in proteins and good for health too. Let’s go with the making, the vital part in this is after you spread the fish with the masala let it remain for at least 1 hour, then only the fish will get blended with the masala.


To Grind:
  • Red chilies- 8 Nos
  • Small Onions- 6 Nos
  • Coriander Powder- 1 Tspn
  • Garlic- 5 Nos
  • Black pepper seeds- 2 Tspn
  • Coriander Seeds- ½ Tspn
  • Fennel Seeds powder- ½ Tspn
  • Cumin seeds- 1 Tspn
  • Mustard seeds-1 Tspn
  • Turmeric powder- ¼ Tspn
  • Lemon juice- 1 Tspn


For Gravy:
  • Onion- 1 Medium
  • Ginger – 1 small piece(finely chopped)
  • Curry Leaves- Few
  • Coconut Oil- 4 Tspn
  • Green chilies- 3 Nos
  • Egg -1 (egg white)
 

Method:

  • Grind all the ingredients under to grind and separate it by two half’s.
  • Spread the one half of the masala to the fish and marinate for at least 1 hour.
  • After 1 hour, just roughly pour the egg white to the fish and shallow fry the fish in the coconut oil.
  • Flip both sides, and transfer to paper towel to set dry.
  • In the same pan, with the same fried oil, throw the curry leaves,onion, ginger and green chilies and saute well.
  • After the onion becomes translucent, add the other half of the masala and saute well until the masala smell goes off from it.
  • Pack the fish pieces with the masala on both the sides and spread completely to it.
  • Add few more curry leaves on top and serve hot.
 

Tips:
"Adjust the red chilies and green chilies as per your spice level.

If you don’t want to add egg white to the fish you can leave it as its optional.

Use only coconut oil to give you the best result.

Be sure not to break the fish while packing it with masala."

Tuesday 17 December 2013

I know you may get confused by the title. Let me make it clear, it’s a 100% vegetarian snack which got the name as “Kozhikaal” just because of its appearance. If you are from Thalassery I don’t want to say much as I am very sure that would have known and tasted it. Yes, this is an authentic Kerala recipe from the region of Thalasseri. You can find this if you go to any beach sides there. Thalassery is not just the hub of spices but also different Malabar recipes, I would say if you want to taste the right Malabar authentic dishes this is a right place for you.

One among those recipes is the kozhikaal, I know anyone will think that it’s made out of chicken legs; however it’s a very easy snack which is prepared out of tapioca. It’s a same recipe like the banana fritters but there are little more ingredients to add in it. For the making, slice the tapioca as thin for about 5 cm lengths. It tastes absolutely great when served with hot tea in a rainy evening!! :) Here you go with the making of it from the Paris of Kerala- Thalasseri recipe :)


Ingredients:
  • Tapioca- 1 Medium size( sliced as thin pieces)
  • Besan Powder- 5 Tspn
  • Fine Rice powder- 3 Tspn
  • Asafetida powder- 1 ½ Tspn
  • Kashmiri Chilli Powder- 2 Tspn
  • Green chilies sliced- 1
  • Onion- 1 medium finely chopped
  • Curry Leaves- Few
  • Cumin Seeds- ½ Tspn
  • Salt- As needed
  • Coconut Oil- To Fry

Method:

  • Make a thick batter out of all the ingredients.
  • Grab 3-4 slices of tapioca pieces together, dip into the batter and fry it until it turns crispy.
  • Transfer to a paper towel and serve hot.


Tips:
"You can add cumin as powder as well as it gives you an extra taste.

Adjust the chili powder as per your spice level."

Friday 13 December 2013

Kinnathappam is very popular traditional sweet cake widely prepared in North Malabar especially in Kannur. Kinnam refers to a shallow copper or steel vessel in malayalam. It’s one of a mouthwatering recipe as it is prepared out of rice grounded with coconut milk with mix of ghee and sugar gives you a ultimate treat for your taste buds. This is the first time I prepared it and it turned out so tasty. It may look tedious but it’s very simple to make and serve. The traditional way of making a Kinnathappam is in a uruli or a bronze vessel. But unfortunately I don’t have any of these here with me. I tried with the round baking tray. So if you have any of those then you are good to do.

Some may not use egg in it, but the version I made has egg in it, which gives you an extra taste and it makes the Appam spongier as well. You can grind the rice in mixie/blender however if you do it in grinder it gives you the best result.It is one of a favorite dish which is often made in Malabar families. This has two different versions one with a jaggery and other with sugar, The one I presented here is the sugar kinnathappam. I am very excited to present you all this unique Malabar recipe for my readers hope you all try and like it too.


Ingredients:

  • Raw Rice- 1 Cup
  • Sugar- 1 1/2 Cup
  • Coconut Milk-Thick Milk (Onnaam Paal)- 2 Cups
  • Crushed cardamom- few
  • Cumin seeds- 1 Tspn
  • Egg- 1
  • Ghee- 2-3 Tspn.


Method:

  • Soak the raw rice for atleast 5 hours and grind it to fine paste adding 1 cup of coconut milk and keep it separate.
  • In a blender, add egg,sugar and another 1 cup of coconut milk and blend it well.
  • Add the blended egg mixture to the rice paste and mix well.
  • Add the crushed cardamom and pour it to the pan.After pouring to the pan sprinkle the cumin seeds to it and keep it in steamer (use idly cooker if you have) for 20 minutes.
  • Check after 20 minutes by pricking a toothpick at the center to it, if it comes out clean then its done. After it set cool transfer to a plate.


Tips:
"While grinding the rice, do not pour the coconut milk all at once; instead add it in regular intervals.

Steaming time may differ, hence check at regularly while its steaming."


Saturday 7 December 2013

Eggs are always a common ingredient with any food, the way you mke it makes the difference, especially when comes to egg curry,there are lot other ways to do egg curry, however the kerala egg curry gives you a unique taste and look,though I gave the egg curry in my Appam and mutta curry post that was a different version which is plain and easy.

This kerala egg curry is a different version which has green peas and coconut milk in it,rest of the ingredients remains same. This egg curry goes well with Appam, parotta,puttu and even with dosa too. This is a nadan (traditional) egg curry which is prepared with the spices and gives a flavored taste. Very easy to make and I bet anyone will fall in love with this recipe, no more words to say; here you go with the making!


Ingredients:
  • Baked Eggs- 4
  • Onion- 1 Sliced
  • Tomato-1 sliced
  • Green Chilies- 3 Nos
  • Thick Coconut Milk(Onnaam Paal-1st Milk)- 1 Cup
  • Green Peas- Half Cup
  • Coriander Powder- 1 Tspn
  • Chili Powder- 1 Tspn
  • Turmeric Powder- ¼ Tspn
  • Mustard Seeds- ¼ Tspn
  • Curry Leaves- Few
  • Coconut Oil- 3 Tspn
  • Cinnamon- 1 small stick
  • Cloves- 3
  • Bay Leaves- 1 small leaf
  • Salt- To Taste


Method:

  • In a pan, pour oil add the spices and the mustard seeds, curry leaves when it splits up add the onions and sauté until it becomes translucent.
  • Add the tomatoes, green chilies and sauté well. Now add the green peas too and sauté again.
  • Add all the powders in the ingredients and sauté well until the masala smell goes from it.
  • Add the coconut milk and let it boil for 2-3 minutes.
  • Add the baked eggs and let it boil till you get the required gravy.
 

Tips:

"You can add tomato puree too instead of adding tomatoes which gives you extra taste.

Add the spice powders s per your spicy level."

Tuesday 3 December 2013

I was about to post this last week, but was busy with our Thanksgiving celebrations. I know this is a very common recipe and most of us know to prepare but I bet getting the right taste is the biggest challenge, many does it in different ways, the one which I have tried is making the masala separate and then mixing it up with the rice, which is easiest method and tastiest as well. It’s my BF’s favorite recipe of mine, and never gets bored out of it, even if I cook for more than twice a week :)

You could add the desired meat in this, however the egg should be used, meat anything like chicken, shrimp it’s your choice and same for vegetables with your choices like beans, carrot, cauliflower. I added the same but with red and green capsicums to add some colors to it. It’s good to serve with tomato ketchup for kids, as they love the fried rice and the noodles varieties, or with any chicken curry which you can find it with my ghee rice combination. Here you go with the making ENJOY!! :) And this is for you Shanmu :) (My best buddy who was asking me to post this from several days)


Ingredients:
  • Basmati Rice Cooked- 1 Cup
  • Chicken pieces cooked (pressure cooker it for 2 whistles)- half cup
  • Eggs- 2
  • Carrot- 1 sliced thinly
  • Onion- 1 Large
  • Green chilies- few
  • Spring Onions- a bunch
  • Beans- 3 sliced
  • Red and green capsicums- 1 sliced thinly
  • Soya sauce- 1 Tspn
  • Vinegar- 1 Tspn
  • Pepper Crushed powder- 2 Tspn
  • Salt- To Taste
  • Curry Leaves- Few
  • Oil- 2 Tspn

Method:

  • Separate the chicken pieces to small pieces and remove the bones if you cooked with bones and keep separate.
  • Bake the vegetables separately and keep aside.(Use microwave oven for 10 minutes to boil the veggies) and keep separate.
  • In a separate pan, pour oil, add curry leaves, and when it cracks up add the ginger garlic paste, onions, green chilies and spring onions and sauté well.
  • After the onion gets cooked well, add the eggs and sauté continuously without burning it at the bottom, sauté until you get a proper dried scrambled egg.
  • Add the soya sauce, vinegar and pepper powder with salt and sauté again.
  • After the masala smell goes off, add the baked chicken pieces and sauté again.
  • Now mix well the prepared masala to the cooked rice. Add salt if required.


Tips:
"Add the required salt when you adding the sauces for the perfect taste.

Adjust the pepper powder as per your spice level.

After adding egg you should stir continuously else it may get burnt at the bottom."


Tuesday 26 November 2013

For a change, how about Chinese recipes for this week, as being Thanksgiving week and most families celebrate with their kids and friends. There is no doubt that all kids will definitely love the Chinese foods especially the noodles, for them it’s fun to play around with that and I guess you don’t need to force to have than you struggle with feeding a rice or other food varieties. If you don’t want to add the Shrimp in it, you could exclude it and make it out of your desired meat, if vegetarian then you could add the vegetables like carrot, beans and cauliflower too, however the making remains the same.

I even personally love noodles, last week when we visited to a Thai restaurant, we had it, but that was spaghetti. There is a difference between a noodle and spaghetti both in look wise and the size too. Here I used the spaghetti as it gives you extra flavor as well as the taste, however be careful when you are getting it from the shop, as there are lot of varieties, just go for the “plain spaghetti” as some may have with flavors and soups too. Let’s move to the Indian way of making a “Shrimp Noodles” .I am sure you may absolutely love IT!!!!


Ingredients:
  • Fresh or frozen Shrimps: ½ lb/ ¾ Kg
  • Chinese Egg Noodles – 1 Medium sized packet.
  • Onion – 1
  • Thinly sliced and cooked Carrots – ½ Cup
  • Sliced and cooked Beans – ½ Cup
  • Turmeric Powder – 1/4 Tspn
  • Ginger garlic Paste- 1 Tspn
  • Chili Powder- ½ Tspn
  • Coriander Powder- ½ Tspn
  • Onion Powder – 1 Tspn
  • Garlic Powder – 1 Tspn
  • Chopped Spring Onions– 1 bunch
  • White Pepper – 1 Tspn
  • Oil – 2 Tbsp
  • Salt – To Taste
  • Lemon Juice – 1 Tspn
  • Soya Sauce- 1 Tspn
  • Chili Sauce- ¼ Tspn
  • Red pepper crushed- 1 Tspn

Method:

  • Marinate the Shrimp with turmeric, chili powder and ginger garlic paste and keep for at least ½ hour.
  • In a pan, heat water, when it bubbles up add the noodles and cook until the noodles is cooked well, drain the water and shower the noodles in cold water just for it to get separate and keep aside.
  • In a separate pan,heat oil, add onions, add the cooked vegetables and add the eggs, scramble them well.Stir continuously without burying them at the bottom.
  • Add all the powders in the ingredients, and then add the marinated shrimps and cook in low heat until the masala gets well into the shrimp and even the shrimp should also cook well.
  • After the shrimp is cooked well, add the soya,chili sauces,red pepper crushed and give a stir again.
  • Add the chopped spring onions and add the cooked noodles and stir well to mix everything well.
  • Squeeze the lemon to it and serve hot with ketchup.


Tips:
"If you are adding cooked shrimp then no need to keep stirring.

You can add your desired vegetables if needed to this.

Adjust the spice powders/sauces as per your spice level."


Friday 22 November 2013

I am obsoletely sure that every vegetarian has a passion towards this recipe. It’s a great recipe spiced with masala powders and garlic flavor gives you a treat for your taste buds. Most of them prepares it by just adding the powders as it is, however when you prepare by the way how I made by roasting and grinding to powder it gives you the extra taste. I know its not a big deal to prepare this kuzhambu, but its difficult to get the right taste,infact I tried with different versions and ended up with the tastiest one.

The making is very simple and its best when served with hot rice and pappad.The powder I used here is made out of grinding the ingredients under to roast and grind, you can store this powder for further preparation of vatha kuzhambu or pulikuzhambu. If you want to store the powder just increase the amount of ingredients used, with the same ratio.


Ingredients:
  • Garlic- 10 pods
  • Tamarind –Lemon size(make as a paste)
  • Fenugreek seeds- ½ Tspn
  • Gingely Oil- 3 Tspn
  • Curry Leaves- Few
  • Mustard Seeds- 1 Tspn
  • Small Onions-Few
  • Tomato- 1
To Roast and grind:
  • Dry red chillies – 5 Nos
  • Coriander Seeds/- 3 Tspn
  • Rice – 1 Tspn
  • Urad Dal – 2 Tspn
  • Mustard Seeds – 1 Tspn
  • Pepper – 3 Tspn
  • Cumin seeds – 2 Tspn
  • Toor Dhal – 1 Tspn
  • Channa Dhal- 2 Tspn
  • Fenugreek seeds – 1 Tspn


Method:

  • Dry roast the ingredients under to roast and grind and keep aside.
  • In a pan, pour oil, add curry leaves, mustard and fenugreek seeds, when its splits add the small onion and fry until it becomes translucent.
  • Add the chopped tomato, garlic and sauté well until it becomes soft.
  • Add the ground masala powder and stir until the masala smell goes from it.
  • Add the tamarind juice and keep the flame in medium. Let it boil and stands in the stove until the gravy gets thickened well.
  • Serve after it becomes warm with hot rice.

Tips:

"Always serve the curry when it becomes warm, so that the curry will be thick.

Cook the curry until it becomes thick; else it may not look thick and doesn’t taste so great.

You can use coconut paste also, but its optional."


Tuesday 19 November 2013

I think this is a 100% recipe which is eligible to be at this page, Kambu kali is very famous in most of Tamil Nadu families, it’s extremely healthiest food and to be consumed especially during summer. The proper way of making the kali is getting the pearl millet as a whole and grinding it to a coarse powder to use, but unfortunately I don’t get the whole millet hence I used the flour in making. It tastes great when you have it Karuvatu Kuzambu or with any fish curry. Try making this with a erumbu karande or a wooden ladle to make it, as it’s really little hard to stir well. Here are some of the nutritious facts which I have gathered a few information from the internet for the readers.


You can make the kambu Koozh too as, it tastes great as its made with buttermilk. If you are too busy in the mornings to make breakfasts then these foods are a good choice, as its easy to make and a healthiest food to make you stay refreshed for the whole day. I still remember the person who sells the kambu koozh in many places near temples. Especially while we roam a lot in the Indian summer, when you have the kambu koozh you feel like heaven, it makes the body cool than you having a cold beverage.

Few Nutritious Facts:

  • Millets are a great source of starch, protein and fiber. It is said that the amino acids in the pearl millet are more easily digestible than the ones found in wheat.
  • Rich in methionine (an amino acid), B complex vitamins (niacin, thiamin, and riboflavin), folic acid, lecithin, potassium, magnesium, manganese and zinc as it lowers blood pressure and reduces the risk of heart attacks.
  • Pearl millet is a rich source of phosphorus, which plays an important part in the structure of body cells. This element is also a crucial component of nucleic acids, which are the building blocks of the genetic code. Rich in phosphorus is a constituent such as cell membranes and nervous system structures.
  • Recent studies have proven that regular consumption of pearl millets help in preventing gallstones in women. They contain insoluble fibers which not only speed up intestinal transit time but also reduce the secretion of bile acids. Pearl millets are known to increase insulin sensitivity and lower the level of triglycerides.
  • Regular intake of millets provides protection against breast cancer in pre-menopausal women. Apart from that, it has also shown a considerable reduction in the occurrence of wheezing and asthma in children.
  • Millets contain an essential phytonutrient, lignin, which is very beneficial for the human body. With the help of natural flora, lignans get converted to mammalian lignans and they fight against hormone-dependent cancers and reduce the risk of cardiac arrests.
  • Consumption of pearl millets helps in minimizing the risk of type 2 diabetes. Being a good source of magnesium, millets act as a cofactor in a number of enzymatic reactions.

 
Ingredients:
Kambu Kali:

  • Kambu Flour- ½ Cup
  • Any cooked Rice (Except raw rice)-1/2 Cup
  • Water- 3 Cups
  • Salt- As needed


Method:

  • In the boiling water add the kambu flour and stir it and let that cooked well
  • In the same pan, add the cooked rice  and smash it all together 
  • Add the required salt and make as large balls(after it sets cool). Serve hot with desired curry or chutney
Ingredients:
Kambu Koozh:

  • Cooked Kambu Kali or Cooked kambu (cooled): ½ Cup
  • Butter Milk- ½ Cup
  • Green Chilies- 2 sliced
  • Small Onions- 4 Nos Sliced
  • Curry Leaves-Few
  • Coriander Leaves- Few

Method:
  • Whip up the buttermilk and mix it with all the ingredients and keep it in refrigerator for atleast 10 mins.
  • Serve cool with raw onions.


Tips:
"While making kambu kali, stir continuously with a ladle to avoid lumps.

In making kambu koozh, whipping up the buttermilk is very important as it tastes good.

You can add a tspn of curd in the kambu koozh as it gives an extra taste."

Friday 15 November 2013

Squid are very famous in kerala, the look of the fish may little strange, but if you have it cooked you will really love it. It’s a pride dish of a non-vegeterian Malayali :) Kanava is made as curry, thoran and also as fried. Cleaning is the big time work, but most of the keralites, handles it well. My Amma and Ammuma use to clean it so fast and especially when I say kanava, I just remember the way how my Ammuma use to make with her magic hands with mud pots in viragu addupu(chulha) and even my Amma never could get the taste of hers. Here is my Ammuma’s recipe for you all..

If you are a first time to prepare this, please refer to cleaning kanava videos in youtube, so that you can do it properly, and its very important too. After cleaning, cut the pieces as little cubes like how I did and then start your making. There is a very simple making as well, as my Amma use to pressure cooker it for 3 whistles and then she makes it as shredded and mixes with coconut, salt and pepper that’s also again it’s a great dish to have..you can have this curry served with hot rice or with chappathi too..Its more like how you prepare a kerala fish curry, but you are adding ginger in it, , kanava can create gastric problem and so adding ginger will help in digestion


Ingredients:
  • Kanava cubed pieces- 1 Cup
  • Tomato- 1 Sliced as big pieces
  • Drumstick- 1 (optional)
  • Coconut-1/2 Cup
  • Ginger- half inch
  • Tamarind – lemon size
  • Turmeric powder- ¼ Tspn
  • Chili Powder- 1 Tspn
  • Green chilies- 4-5 nos
  • Coriander Powder-1 Tspn
  • Salt-To Taste
For Seasoning:
  • Coconut oil- 2 Tspn
  • Mustard – 1 Tspn
  • Curry leaves-few


Method:

  • Make a fine paste of coconut, turmeric powder, ginger, tamarind and keep aside.
  • Pressure cooker the kanava pieces for 3 whistles and keep aside.
  • In a pan (without keeping in flame) mix all the ingredients along with the kanava pieces and the grounded coconut paste adding water.
  • Keep the pan now at flame, and cook it covered for about 5 minutes.
  • Remove the lid and cook it uncovered until the gravy dries up.
  • In a separate pan(in flame) add all the ingredients under “For seasoning” and transfer it to the boiling kanava curry.
  • Turn off the heat and serve hot.
 

 Tips:
"Adjust the chili powder as per your spice level.

Adding drumstick is optional but it gives a good taste."

Tuesday 12 November 2013

If you are a regular visitor for Anjappar restaurants in Tamil Nadu, iam sure you would have tested this. They serve the kaadai roast and it tastes so good that every non-vegeterians will fall in love with that. I haven’t tried this, and for me I know about kaadai only through my best buddy. In India, in southern parts, it’s easy to get, however if you stay at other countries you can try getting these at some fresh meat stores, I got it from Sprouts and as I said I never tried making it, got this recipe from my friend and it just tasted so good.

Quails are nothing but small birds and it tastes more like chicken, but this has more bones in it. Hence, whenever you get it, try getting large quails as it may have little more flesh than the smaller or thinner ones. You could make a biriyani or a curry out of this, but I like the quail when it’s roasted with pepper and our Indian masala powders. Just try this, and surprise your dear ones.. here you go with the making :)


Ingredients:
  • Kaadai(Quail)-3 Nos
  • Small onions- 4-5 nos(finely chopped)
  • Green Chilies- 3 Nos
  • Garlic crushed- 2-3 pods
  • Chili Powder- 1/2 Tspn
  • Coriander Powder- 1/2 Tspn
  • Turmeric Powder-1/4 Tspn
  • Garam Masala- 1/2 Tspn
  • Ginger crushed- 1 inch


To Marinate:
  • Curd-2 Tspn
  • Chili Powder- 1/2 Tspn
  • Coriander Powder- 1/2 Tspn
  • Turmeric Powder-1/4 Tspn
  • Garam Masala- 1/2 Tspn
  • Pepper Powder- 1 Tspn
For Seasoning:
  • Oil- 6 Tspn(preferably mustard oil)
  • Curry Leaves- few
  • Cloves- 2 nos
  • Bay leaves- 1
  • Fennel Seeds- 1 Tspn


Method:

  • Marinate the quails with all the ingredients under "To marinate" and keep at least for ½ an hour.
  • In a separate pan, add oil and add all the ingredients under "for seasoning". Add small onions, green chilies and sauté until it becomes translucent.
  • Add the crushed garlic and ginger and then add the chili, coriander and turmeric powder and sauté well.
  • Add the cleaned quails and cook covered for about 10 minutes, now open the lid, and cook again.
  • Add salt and lower the flame and let it get fried in the pan; give out a stir in intervals until it turns dry.


Tips:
"Don’t compromise on the oil, as if it’s cooked with less oil, it may not turn so crisp.

You can also add little coconut, but it’s purely optional."

Friday 1 November 2013

I know most of you would have done with all your sweet preparation, how fun it would be to spending time with family friends, sharing sweets, oil bath, crackers :) I really miss my family.. wish I could make it atleast next year.. this post is for someone who still looking to prepare some snacks..Kara sev is the most easiest snack to make and it’s a favourite for most of the people.


My Amma likes kara sev very much and she was much surprised when she heard that I made it rite. Those days they use to make kara sev out of the big ladle holes, but I just tried making it by the three hole idiyappam press which I have which made my job very easy as well. Store the kara sev in a air tight container so that the pepper and asafetida will mix up well and gives a good flavor to it. Here you go with the making. I wish all my readers a very happy diwali :)


Ingredients:
  • Gram Flour- 1 Cup
  • Rice Flour- ¾ Cup
  • Turmeric Piwder- a pinch
  • Asafoetida- ¼ Tspn
  • Cumin Seeds- ¼ Tspn
  • Pepper grinded coarsely-1/2 Tspn
  • Salt- To Taste
  • Butter- 2 Tspn
  • Oil- For Frying


Method:

  • Melt butter and mix with all the powders with enough water and to make a stiff dough.
  • With the help of three hole muruku press gently the dough into the hot oil.
Tips:
"Make the dough stiff, as if its loose, it may not come out properly from the hole."

Tuesday 29 October 2013

Yay! Its diwali time, I know most of the house wives will be thinking about what to make and impress their families and friends, like me. I wanted to try something, very different and tasty as well and I ended up making my mind to prepare these incredible “Sweet Somas”. Believe me it may look little difficult but when you do it with right measurements; you will get it absolutely fantastic results. I most important factor in making this “Sweet Somas” is the time you keep the dough before you go with the making. I kept the dough for 2 and half hours. I more time you keep the dough, the more fluffy it become while frying. The powder that I prepared for the stuffing can be kept in the refrigerator, as that can be served by itself, especially many kids love by eating by itself.

The most tedious process is bringing the shape, I used poori press to flattern maida, as it may shrink when you do it by hand.It is an excellent sweet to serve on special occasions like diwali, as it is crunchy and you won’t end up just having one or two. Yes feel free to comment how many you ate (lol). I know most of you are very curious to know about my “Diwali Special Post”, I dedicate this to you all. “I wish you and your family a wonderful Diwali”. You still have 4 more days to go, so get yourself prepared to make this Sweet Somas at your Diwali Sweets List.


Ingredients:
  • Maida-1 Cup
  • Corn Flour- 2 Tspn
  • Oil- 2 Tspn
  • Salt- a Pinch
  • Roasted Gram/Potukadalai- ¼ Cup
  • Sugar- ½ Cup
  • Coconut grated- ¼ Cup
  • Cardomom-few
  • Oil- For Frying


Method:

  • Mix Maida, Corn flour, Oil, Salt with approximately ¼ cup of Water and make a soft dough and set aside at least for 2 hours
  • Meanwhile grind Roasted Gram (Pottu kadalai) coarsely and keep aside
  • Grind Sugar along with Cardamom to fine powder and keep aside
  • Dry roast Coconut in a separate pan, just for 2 minutes
  • Mix the all the above grounded powder along with coconut and keep it separate (this serves as a stuffing for Samos)
  • Now,make balls and flattened the Maida dough and keep the stuffing powder at the center as shown below


  • Close the dough a shape of Somas and close the ends tightly
  • Drop the stuffed Somas to the Hot oil and fry until it turns to golden brown and transfer it to a paper towel to set it dry


Notes:

"Make sure to close the flattened dough completely without any opening, as the stuffing may come out while deep frying

You can also use the poori press to flattened it right

Make sure to keep the Somas in a air tight container to stay fresh and crunchy"


Friday 25 October 2013

Here is a new variety for you all in my pastries page,for many days I was thinking to post something with orange, but couldn’t get a rite pastry recipe, after long trials, got this one from my baking class book, which I did during my college days. though I couldn’t able to recognize the taste, i tried it on my own, and got the real taste of the shortbread, you can bake this as a cake or even a shortbread as I did. This is a very simple one, easy to bake and tasty to have as well.

All you need is the common ingredients of making a cake and frehly squeezed orange juice and the orange zest(the outer skin of the orange,as it in the below pic), you may wonder why every time I use the outer skin of a lemon/orange in many of my pastries, the reason being it gives a very good flavors of the fruit and tempts you to have more. Make sure to wash your oranges thoroughly before grating and while grating do not grate the white pith underneath, as it adds a bitter taste to the shortbread. After you squeeze the oranges, pour the juice through a fine mesh strainer to remove any seeds or pulp if any.


Initial Specification:
  • Temperature:325 Degrees F(170 Degree C)
  • Time:50-60 Minutes
  • Pan Used: a 9 x 5 x 3 inch (23 x 13 x 8 cm) loaf pan(Butter it and keep it for a while)


Ingredients:
  • Eggs- 5 (Separated yellow and white)
  • All Purpose flour- 1 ½ Cup
  • Sugar- 1 Cup
  • 2 Large Orange squeezed juice.
  • Oil(Any)- ½ Cp
  • Vanilla Extract- 1 Tspn
  • Baking Powder- 1 Tspn
  • Orange Zest- 1 Tspn
  • Cream of tartar(optional)- ¼ Tspn
  • Salt-1/4 Tspn


Method:

  • Mix all the dry ingredients well I,e flour,sugar,orange zest and baking powder(Step 1)
  • Add the oil, orange juice,egg yolks and the vanilla extract to the flour and beat highly for about 2 minutes.
  • In a separate bowl, beat the egg whites in a very high speed until it becomes like foam at high speed for about 4 minutes.
  • Add the egg whites to the batter (Step 2) and mix with a ladle(do not beat)
  • Pour the mixture to the loaf pan(Step 3) without any lumps.
  • Bake it for the said time and transfer to the wire rack and set it until it becomes cold.

Before serving, you can dust the bread with the icing sugar however its purely optional.