Friday 28 March 2014

Who doesn’t love the taste of a perfect biriyani? I bet no non vegetarians does that. Especially the hyderabadi chicken dum biriyani. Hyderabad is always famous for biriyani and even in many other cities, there are certain restaurants which serves exclusively the hyderabadi chicken dum biriyani. Nowadays the fame of biriyani is getting rich day by day. Especially during the weekends everyone would be longing to go restaurants to have a perfect biriyani. Hyderabadi chicken biriyani takes the first place among all the varieties. I never thought I could make a tasty hyderabadi biriyani at home and I thought the making would be tedious as well until I tried it.

This biriyani is not like an usual one, as the entire process is different as the chicken should be kept in refrigerator overnight to get the best result and it should be as dum at the last stage and that how it stands for the name.

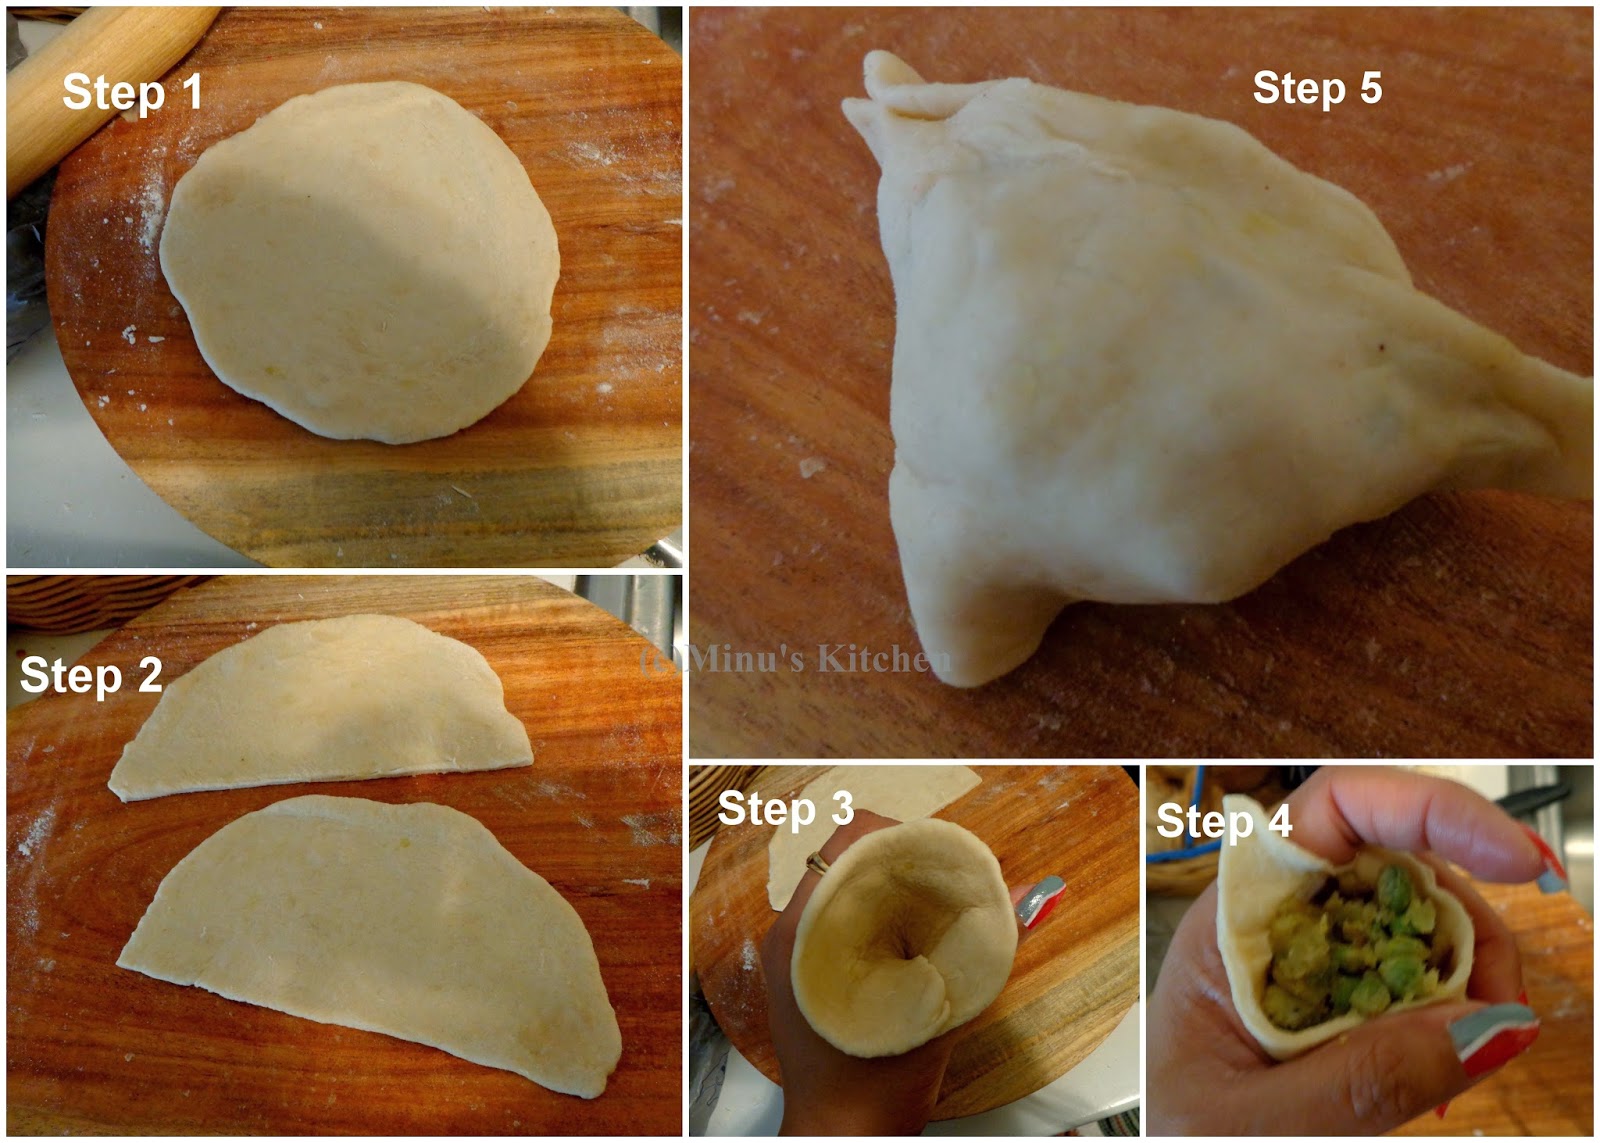
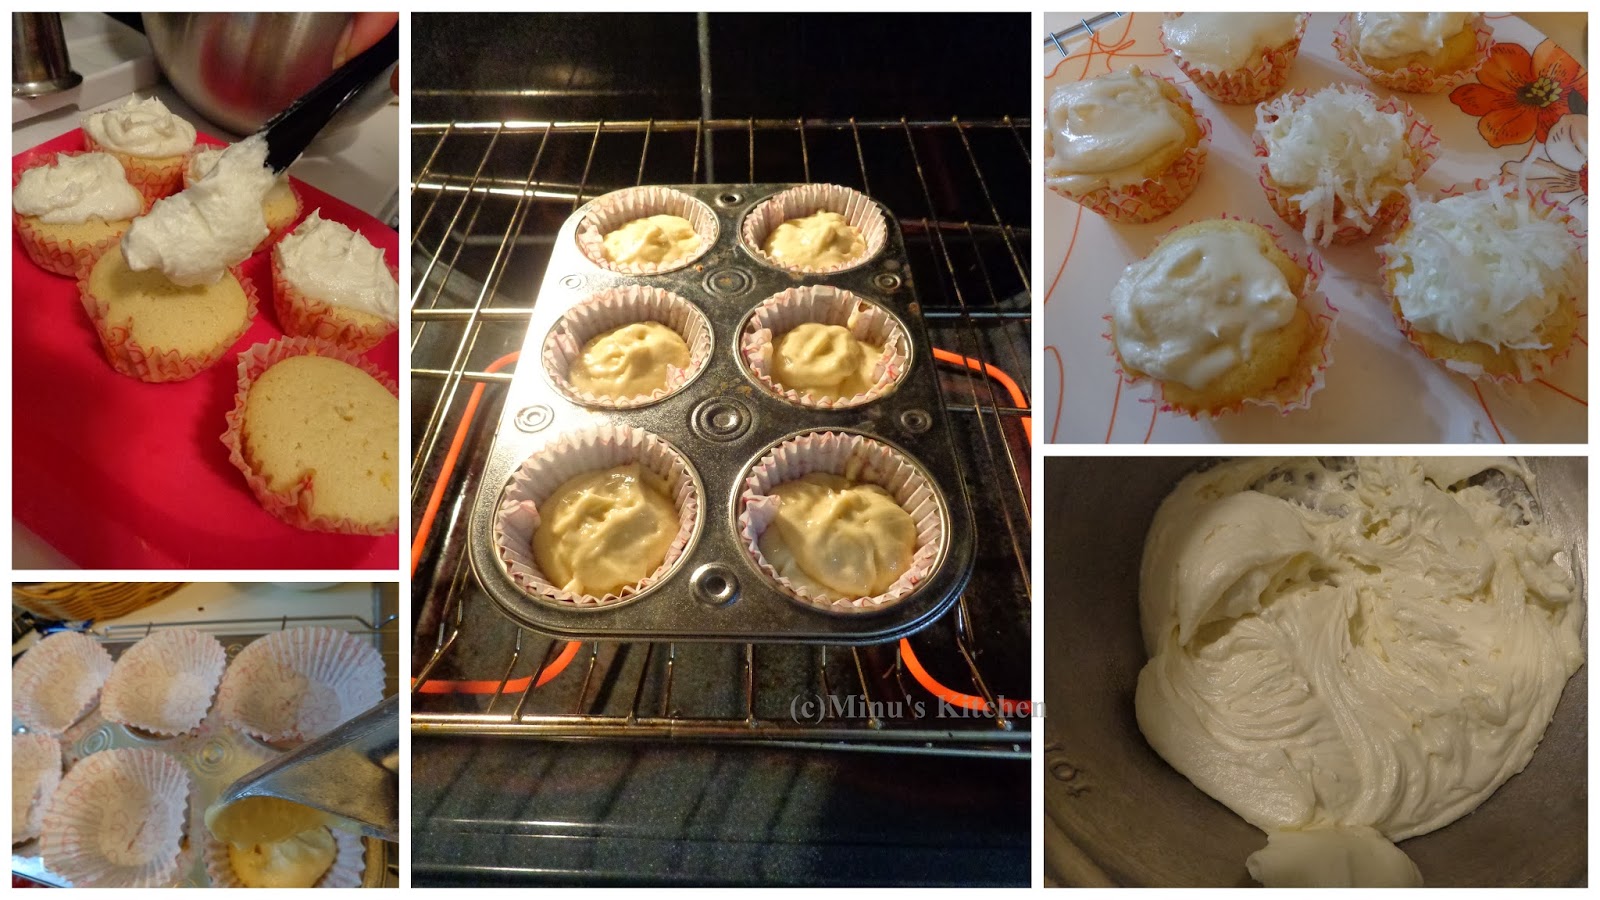
Before making it, the vital ingredient would be the roasted onions. It’s very essential as it gives a good flavor and a taste to the biriyani. So, deep fry few onions until it becomes crispy and we use that for the layering process. Also make use big pieces of chickens for it. It goes well with raita and fried chickens. I made raita with the salad tomatoes and cucumber. As I said, it’s made by dum, always use a air tight with thick bottomed container. Also some uses the readymade masala however, I don’t want to compromise on that and I made freshly ground masala powder.I have posted few snaps when I am preparing, it may help you to understand better.


Ingredients:
For Marinating Chicken:

  • Chicken cut as Big pieces- 1 Lb/ ¾ Kg
  • Chili Powder- 1 Tspn
  • Coriander Powder- 1 Tspn
  • Turmeric Powder- ½ Tspn
  • Mint Leaves- 1 Cup
  • Coriander Leaves- 1 Cup
  • Oil- half Cup
  • Green chilies- 3 nos
  • Lemon juice- ¼ Cup
  • Ginger Garlic Paste- 2 Tspn
  • Curd- 1 Tspn
  • Grounded Powder(See below)
To Ground as powder:

  • Cardamoms- 5 Nos
  • Cloves- 4 Nos
  • Bay Leaves- 2 Big
  • Star Anise- 3 Nos
  • Coriander Seeds- 2 Tspn
  • Pepper Seeds- 1 Tspn
To Cook Rice:

  • Basmati Rice- 2 Cups (Soaked in water for atleast 1 hour)
  • Cardamoms- 5 Nos
  • Cloves- 4 Nos
  • Bay Leaves- 2 Big
  • Star Anise- 3 Nos
  • Water- As needed
  • Salt- To Taste
To Cook Rice:
  • Fried onions( deep fry until it turns crispy)- 1 Cup
  • Milk- ¼ Cup
  • Saffron- few
  • Rose Water- 1 Tspn
  • Maida- 1 Cup
  • Ghee- 2 Tspn


Method:
For Stuffing:

  • To start with, first make the masala powder by grinding all the ingredients under to ground as powder and keep aside.
  • Soak the saffron in the milk and keep aside.
  • In a separate pan mix the chicken pieces with all the ingredients under “for marinating chicken” along with the grounded powder and keep it in refrigerator overnight.
  • The next day, soak the rice for about 1 hour and take the chicken from the refrigerator before you make.
  • In a pan, pour water, when it starts boiling add the spices listed under “to cook rice” and salt. Add the basmati rice and cook for a while. The rice should not be fully boiled. It should be half done. So, when you press it, it should be little hard and that’s the correct texture else getting the right biriyani is difficult.
  • After its half cooked, drain the rice and keep aside.
Assembling the pan:


  • In the heavy bottomed pan, pour ghee at the bottom and spread it evenly, now, add the marinated chicken pieces (please note chicken is not cooked; it’s the chicken which is marinated overnight).
  • On top of it, add the drained rice and top it again with crispy fried onions and again top it with rice. Overall the chicken should be at the bottom and the rice and onions should be on the top.
  • After all the rice is layered pour the soaked saffron milk and on top of it, add the rose water it gives a good flavor.
  • Close the pan tightly and make a maida dough, now, close the pan with the lid and press the maida dough around the lid to make it tight.
  • Now, keep the pan in the stove in high flame for about 15 minutes and change it to low flame and cook in low flame for about 10 minutes.
  • After the set time, let it stand for about 5 minutes. Serve hot with raita.


Tips:
"Do not get confused if the chicken will be cooked as we are adding the marinated chicken, as the chicken pieces will be well cooked in the dum itself. Hence don’t be panic on that part.

You can add the orange color mixed in water instead of using the milk soaked with saffron.

If you don’t want to grind the masala powder, you could use just the readymade garam masala powder.

Adding rose water is optional however if you use, it gives an extra flavor to the recipe."


Tuesday 25 March 2014

Samosas are always special and its favorite snack for most of us, it’s a perfect snack for a tea time. I love samosas and whenever I have it I thought the making would be tedious because of its structure and taste, and even when I start making it, I was little confused if I get the shape. I was surprised when I saw them perfect and it was very simple to make as well. The taste of samosa is ranked only by its stuffing. The stuffing is made in different types as some uses potato and some only with the peas and other vegetables. I have given few snaps for you to understand the rolling process which may help you to make it simple. 

I used the all-purpose flour for the outer cover, and just rolled it, but some people use to toast in a pan slightly the rolled dough. This process is not mandatory, it’s your choice if you want to toast or using it plainly. The toasting would make the samosa very crisp. I skipped doing it as I am not that fond of making the samosas crispy. It’s a fried or baked pastry with savory filling, such as spiced potatoes, onions, peas, lentils and sometimes ground beef or ground chicken. In Kerala most of the bakeries will have the beef or chicken as the stuffing. I wish you to get it perfect and enjoy your tea time :)


Ingredients:
 

For Stuffing:

  • Potato- 2 Medium
  • Peas (frozen)- ¼ cup
  • Onion sliced- 1 Nos
  • Green chilies- 1 sliced
  • Grated ginger- ¼ Tspn
  • Garam Masala- 1 Tspn
  • Turmeric Powder- ¼ Tspn
  • Coriander Powder- 1 Tspn
  • Curry Leaves- few
  • Coriander leaves- few chopped
  • Salt- To Taste
For Outer Layer:

  • Maida/All Purpose flour-1 Cup
  • Oil- To deep fry
  • Salt- To Taste


Method:

 
For Stuffing:

  • Cook the potatoes separately in a pressure cooker for 2 whistles, after it set cool peel the skin and smudge the potatoes and keep aside.
  • In a frying pan, pour oil, add the curry leaves, ginger and onion and sauté until it becomes translucent.
  • Add the peas and sauté for 2 minutes add, garam masala, coriander powder, turmeric powder and salt and sauté until the masala smell goes from it.
  • Lower the flame and add the smashed potatoes and stir well to combine everything.
  • Add the chopped coriander leaves and set aside.
For Outer Layer:

  • Make dough by adding water little by little to the all-purpose flour and set aside for about 10 minutes wrapping with a thin cover.
  • Start working with the dough as shown in the below making pictures.


  • In the hot oil, deep fry the stuffed samosas and transfer to a paper towel to remove excess oil.

Tips:

"If you are not using the frozen peas, soak overnight and cook it separately before you make the stuffing.

Do not compromise on the coriander leaves s it gives a nice flavor to the stuffing.

If you do not use the potatoes add other vegetables such as carrot and peas and you can add lentils as well."


Friday 21 March 2014

Potato fry recipes are very common and cooked in most vegetarian families however this one is something which uses tomato ketchup as one of a ingredient and so the taste is also awesome.. I have been thinking to present a tasty and easy vegetarian recipe. It’s a very simple and tasty side dish which can be served rich with rice or any dish for your lunch. The idea of making baby potatoes came into my mind when I saw them after a very long time in a super market. Though it doesn’t take much to time to make, however the longer time for making this would be baking the potatoes. Just to be very sure if your potatoes are cooked well, prick a fork at the center and you could find it.

I am not that fond of potatoes but my bf does. He likes potatoes very much in what ever the way I make. I just loved having it with plain curd rice or lemon rice. It would be a perfect choice when you are running out of time but then you cannot compromise on having something good as well. Before you start making, cook the potatoes at microwave as I did for about 8-10 minutes, make sure it shouldn’t be so very mushy or very solid kind. I am sure you may get tempted with the pictures, rewrite your shopping list adding baby potatoes to it :) 


Ingredients:

  • Baby Potatoes (with or without skin)- 8-10 Nos
  • Kasuri Methi- 1 Tspn
  • Garlic- 5 Pods (sliced as thin)
  • Ginger Garlic Paste- 1 Tspn
  • Chili Powder- 1 Tspn
  • Turmeric Powder- ¼ Tspn
  • Coriander powder- 1 Tspn
  • Garam Masala- 1 Tspn
  • Salt- To Taste
  • Mustard Seeds- 1 Tspn
  • Urud Dal- ½ Tspn
  • Curry Leaves- few
  • Tomato Ketchup- 1 Tspn
  • Lemon- Half

Method:

  • Cook the potatoes in the microwave for about 10 minutes and keep aside.
  • In a separate pan, pour oil when it becomes hot add the mustard seeds, curry leaves, kasuri methi and Urud dal and ginger garlic paste and sauté for a minute
  • Add all the powders in the ingredients with salt and again sauté for few minutes until the raw smell goes from it.
  • Add the potatoes and sauté again for few minutes.
  • Add half cup of water and cook it covered for about 5 minutes.
  • After it cooked well and the water is evaporated, add the tomato ketchup and give a quick stir.
  • Set off the flame and squeeze the lemon to it and serve hot.
 
Tips:

"Removing the skin from it, however its not mandatory. If you still like to remove then peel the skin roughly with a knife.

After all the powders are added make sure its not fully dried up as it may not taste good, hence add more oil at that time if its dry.

Since the potatoes are already cooked in microwave, cook carefully as it shouldn’t get mushy.

You can add a chicken masala to it but its optional which you a extra taste to the recipe."


Friday 14 March 2014

Madurai is not only famous for Meenakshi temple, malligai poo there are few more things that adds the asset of it, one among is the “Kari Dosai”.If you had ever tasted the Madurai kari dosai, I bet you must be pining to have it again. It’s a very famous food in Madurai and everyone from Tamil Nadu might be aware of it if not tasted. There are lots of vegetarian dosai varieties, however in the non-veg, I really give a hats off to the person who invented this recipe. It’s a very innovative dish and at first I thought I could taste only in restaurants. But when I prepared at home, my bf enjoyed it like a feast and he added to his favorite among my recipes as he never tasted it before.

Kari dosa is like a mini dosa with meat toppings; the entire dosa is cooked upside down and cooked for couple of minutes, the result an awesome dish with delicious taste.It is not that spicy as you may think. The combination of mutton with Chettinad masala makes it tasty with the combination of egg in it makes you to feel that out of the world taste. Seriously, you may think I am exaggerating it, but the truth will be there at your taste buds after you taste it. If you are a dosa fanatic then I would recommend this to you to try. With no further delay; here you go with the “talk of the temple city” recipe :) 


Ingredients:

  • Minced Mutton- ¼ Kg / ½ Lb
  • Eggs- 2 (beaten)
  • Onion- finely chopped- 1 medium size
  • Tomato- 1 Chopped finely
  • Chily Powder- ½ Tspn
  • Garam Masala- 1 Tspn
  • Coriander leaves- few
  • Ginger garlic paste- 1 Tspn
  • Salt- To Taste
  • Sesame Oil

To Grind:

  • Red Chilies-4 Nos
  • Coconut flakes-3 Tspn
  • Coriander seeds- 2 Tspn
  • Pepper seeds- 1 Tspn
  • Curry Leaves- few


Method:

 
For the masala:

  • Dry roast and grind to fine paste with all the ingredients under “To grind” and keep aside.
  • In a pan, pour oil, add the chopped onion when it becomes translucent add the tomato and sauté again.
  • When it becomes messy, add the chily and garam masala and sauté again.
  • Add the grounded paste and sauté again for 2 minutes.
  • Add the minced mutton and stir well to combine, add a little water for the mutton to cook.
  • Cover it and cook until the mutton is cooked well.
  • After the mutton is cooked, cook it uncovered for the water in it to evaporate.
  • Give a final stir and combine well.
  • Throw few coriander leaves to it and keep aside.
For Dosa:


  • Mix the prepared mutton keema with the eggs beaten and combine well and keep aside.
  • Pour a ladle of dosa batter to the tawa and spread as thick (like you do for uttapam).
  • Pour the egg mutton mixture with spoon to the middle of the batter.
  • Spread the oil in and around the dosa and flip and cook up and down for about 2-3 minutes.
  • Serve hot with raitha or any gravy.

Tips:

"You can also cook the mutton separate in the pressure cooker and then you add it to the gravy to consume time, however if the mutton is cooked along with the masala will gives an outstanding taste.

I used sesame oil for the flavor but you could use the oil of your choice.

No need to add too much of spices, as it may stick while you are having the dosa, hence adding just the powders will give the best taste.

Serving Suggestions: Best taste when served with Raitha or mutton gravy :)"


Tuesday 11 March 2014

After a long period, I got a little time to spend my time in baking at my kitchen. It’s been really crazy that I am going through in weekends, the 2 days just passes like nothing and again the Monday comes Office :) This weekend I didn’t compromise myself and got into baking something interesting as well as time consuming with help of my Bf. Yes, believe me it’s a very simple cupcake that you could make it in 10 minutes (excluding the baking time). The coconut cup cakes are real sponge in texture and when its filled with the cream, it tastes heavenly that too with the sweetened coconut flakes on the top.

These coconut flakes can be grabbed in baking sections in any grocery stores and this is perfect for making coconut cupcakes or a whole cake, however you can use either the sweetened or unsweetened of your choice. But I love the 1st version as it goes well with this. It doesn’t need any much further decorations as the coconut flakes on top of it says it all. After you make you could store in the refrigerator for couple of days as well. The interesting fact about these cupcakes is its best when served the next day after prepared. Go for it and serve it for your loved ones especially the kids as they really go crazy on cupcakes and in fact “Eating a cupcake brings out the kid in all of us” :)

As I said, the making is very simple, I have given the collage only for assembling the cake.


Ingredients:

  • All-purpose flour – 1 Cup
  • Baking Powder- 1 Tspn
  • Butter, at room temperature- ¼ Cup
  • Sugar- ¾ Cup
  • Eggs- 2
  • Vanilla Extract- 1 Tspn
  • Milk- ¼ Cup
  • Sweetened coconut flakes(available in the baking section in stores)- 1 Cup

For Cream Filling:

  • Icing Sugar- 2 Cups
  • Butter, at room temperature – ¼ Cup
  • Cream cheese at room temperature- ¼ Cup or 100 Grams
  • Vanilla Extract- 1 Tspn
Temperature and Time Duration:

  • Temp:350 degrees F (180 degrees C)
  • Time:25 Minutes

Method:
  • In a bowl mix all-purpose flour, salt, baking powder, sugar, soda and cinnamon and set aside.
  • In a separate bowl, beat the butter at high speed for about 2 minutes and add the sugar and beat again for about 5 minutes or until it turns fluffy.
  • Add the vanilla extract and start adding the eggs one at a time and beat again.
  • Now alternately add the flour mixture as two additions and milk as two additions. Beat until everything is combined well.
  • Fill the cupcake wrappers kept in the muffin cake pans with the batter and bake until the said time. (Step 4)
At this point, you could get a spongy cup cake. Check if a toothpick inserted in the middle comes out clean and the texture would very spongy as below


For the cream filling:

  • Beat the butter at high speed until it becomes fluffy.
  • Add the cream cheese and the vanilla extract and beat again for about 2 minutes and then add the sugar and beat until everything is combined well.
Assembling the cup cake:

After the cup cakes are set cooled completely, add the cream filling on the top by using a spoon/knife.
Garnish with sweetened coconut flakes on top of it and serve.

 
Tips:

"Do not prepare the cream filling at the earliest; make it only after the cup cakes are made so that it doesn’t melt.

Assemble the cupcakes only after it’s cooled completely else the cream filling will melt if it’s hot."

Friday 7 March 2014

There are few recipes in my blog for mutton recipes; however the mutton chops is a recipe which is always a favorite among most non vegetarians. It’s a most common recipe found in many restaurants and especially it’s famous in the parotta shops in Tamil Nadu hotels. The making is little different from the normal mutton recipes, and taste awesome when served along with parotta or any rice varieties. Basically this recipe is a thick semi gravy consistency, and hence its takes little more time than the usual time for the preparation, as the gravy should get thick when kept in the flame.

Always I prefer using the red onion for this, as it gives a very good taste and a spice to the recipe. Coming to the pieces, cut into small pieces which is very essential for making mutton chops as big pieces are most suitable for curry or gravy recipes. With lot of my readers I am glad to present this for them. There are lots of ways to prepare the mutton chops, this version is something that I got from my Amma :) and it was really tasty when it’s done. Do try it at your kitchen and I bet you will definitely make it as a favorite for your Sunday cooking.


Ingredients:

  • Mutton (cut into small pieces)- 1 Lb/ ½ Kg
  • Tomato (medium size) – 2
  • Onion- 1 Big Size
  • Ginger Garlic Paste - 1 Tspn
  • Garlic pieces - 6 no(crushed)
  • Coriander Powder -1 1/2 Tspn
  • Chilly Powder - 1 1/2 Tspn
  • Turmeric powder - 1/4 Tspn
  • Garam Masala- 1 Tspn
  • Curry Leaves
  • Coriander Leaves
  • Salt – To Taste
  • Oil – 5 Tspn
  • Lemon- half

To Grind:

  • Coconut Shredded- 2 Tspn
  • Poppy seeds - 1 Tspn
Spices to add:
  • Cinnamon- 1 small stick
  • Bay Leaves- 1
  • Cardamom- 2 pieces
  • Cloves- 2 Nos


Method:

  • Ground the coconut along with the poppy seeds and keep aside.
  • Pressure cook the mutton, half of the onion and tomato(1), curry leaves, crushed garlic, chilly, coriander, turmeric powder with 1 cup of water for 4-5 whistles.
  • In a separate pan, add oil and the spices to add ingredients and sauté for a minute.
  • Add the other half of onion, tomato (1) and ginger garlic paste, garam masala and sauté again until it becomes mushy.
  • Add the cooked mutton piece along with the water and cook for about 10 minutes or until the water is dried out.
  • Add the grounded coconut paste and cook again for about 5 minutes for the gravy to observe well.
  • Squeeze the lemon for the juice to it and garnish with coriander leaves.

 
Tips:

"Do not add more than the said coconut as it may change the taste and the texture.

For best results use sesame oil, if you don’t want to then go for any oil of your choice.

Stir occasionally for the gravy to mix well with the mutton and you can bring the flame low when you are adding the coconut paste."

Tuesday 4 March 2014

In Kerala, each dish are made differently in each cities, example fish curries will not be same in kottyam as how they make in Trivandrum, always Trivandrum recipes are entirely different from other cities in kerala. Same for fish varieties also, not all the fishes are made in the same way as it has own taste when cooked. One among those is Sardines (Mathi) fishes,as they taste so good and there is a particular way to cook it, and not like the other fish variety curries. Mathi fishes are small and have lot of tiny fish bones in it however; it tastes so good and unique. It’s good to make a fry or a curry.

Unless the normal Kerala fish curry, this curry adds onion as an ingredient and rest most of the ingredients remains as same. Before making clean and cut the fish pieces as how I did and make some 2 or 3 cuts in the middle of it for the curry to get into the fish pieces and one most important factor is cooking the curry in the meen chatti( mud vessel) to give the best taste, but if you don’t have one, then go for a normal steel vessel.This is one of a signature traditional fish curry and the process is very simple as one. Always I prefer to have this curry after kept overnight after it’s prepared. Its rich with the flavor and definitely your guests will ask you for the recipe :)


Ingredients:

  • Sardines/Mathi- 6 Pieces(Cut into lengthy size)
  • Tamarind(preferably kudampulli or the normal)- small lemon size
  • Curry Leaves- a small bunch
  • Mustard Seeds- 1 Tspn
  • Coconut Oil- 2 Tspn
  • Salt- To Taste

To Ground as Paste:

  • Small onions- 4 Nos
  • Chili Powder- 1 Tspn
  • Kashmiri chili powder- 1 Tspn
  • Turmeric Powder- ¼ Tspn
  • Fenugreek seeds- ¼ Tspn
  • Ginger- a small piece
  • Garlic- 3 Pods.


Method:

  • Add all the ingredients under “to ground as paste” to the blender and ground to fine paste.
  • In the clay pot or a steel vessel, mix the grounded paste,fish pieces,tamarind, salt and curry leaves(half bunch) with little water and keep it in medium flame. Cook covered for about 10 minutes).
  • Now, cook uncovered for 10 more minutes.
  • In a separate pan, add oil, mustard and curry leaves and when it breaks up add this to the boiling uncovered curry.
  • Cook until the desired gravy is reached and serve the next day for best taste.

Tips:

"Adjust the chili powder as per your spice level.

Since it doesn’t have any coconut, the curry will not get spoiled if kept overnight.

If you need more gravy you can add little more water while mixing the ingredients, however I like mathi curry to be full dried, and that’s why I kept the curry in the stove until all the gravy is dried up."